Contents
1 Overview
This tutorial describes how to use the Ridom SeqSphere+ software to analyze a single target with Sanger sequence data without a reference sequence. If the target is very variable among various samples as it is the case for Internal Transcribed Spacer (ITS) sequences, it is recommended not to use a reference sequence.
2 Preliminaries
- This tutorial requires a running SeqSphere+ client and server. Start the SeqSphere+ server, then start the SeqSphere+ client and initialize the database. For evaluation purpose a free evaluation license can be requested.
- Download and extract the example data archive SeqSphere_Examples_Sanger_ITS.zip
3 Creating Project and Task Template
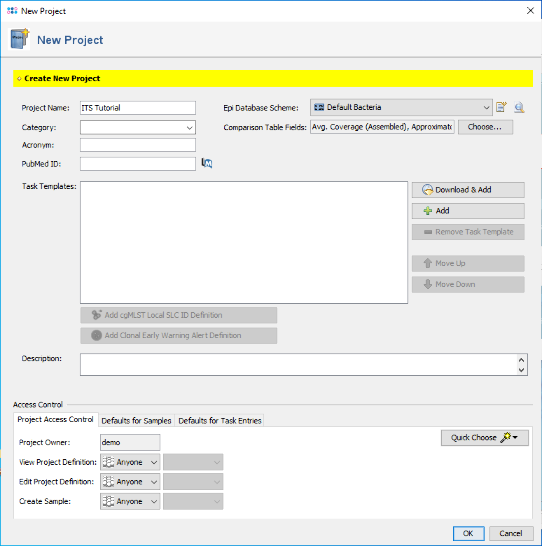
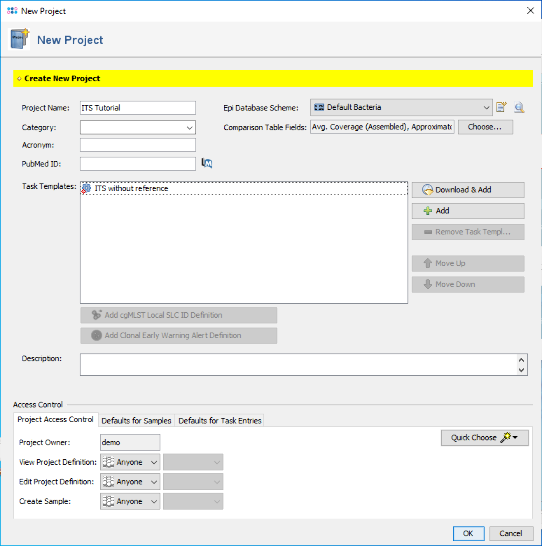
- Step 1: Create a new Project for use with your sample data with the menu command File | New | Create Project
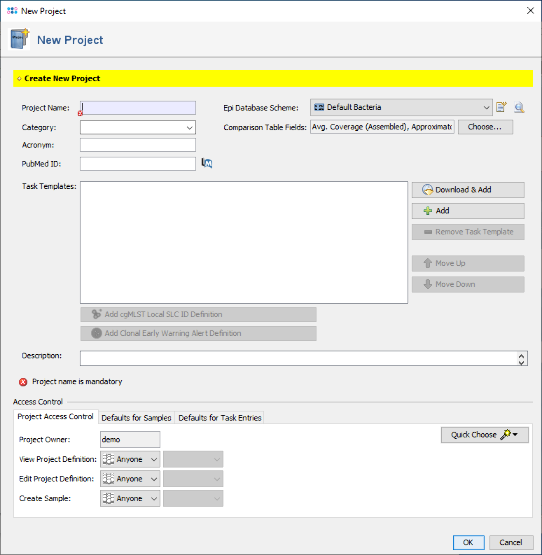
- Step 2: Enter a name in the field Project Name (e.g., ITS Tutorial). The fields Category and Acronym can be left empty.
- Step 3: Each Project within SeqSphere+ needs to have at least one Task Template associated. Press
 Add in Task Templates section for creating a local not public task template.

- Step 4: The dialog window Add Task Template to Project opens and shows the Task Templates that already exist in the database. Press the button
 Create New to create a new one.

- Step 5: Choose the second option Create Task Template for Sanger Sequencing Data.
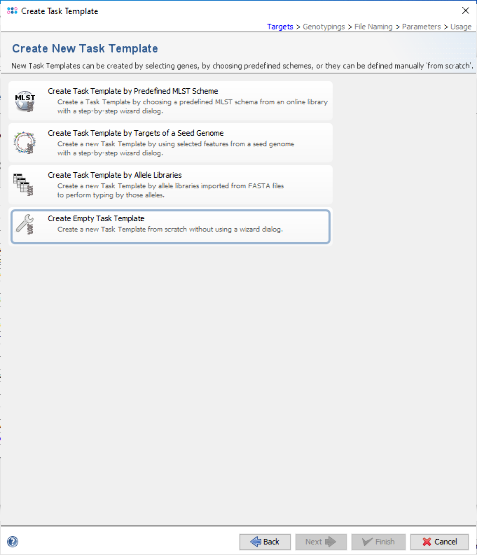
- Step 6: Now choose the last option: Create Empty Task Template. Enter a name for the new Task Template (e.g., ITS without reference).
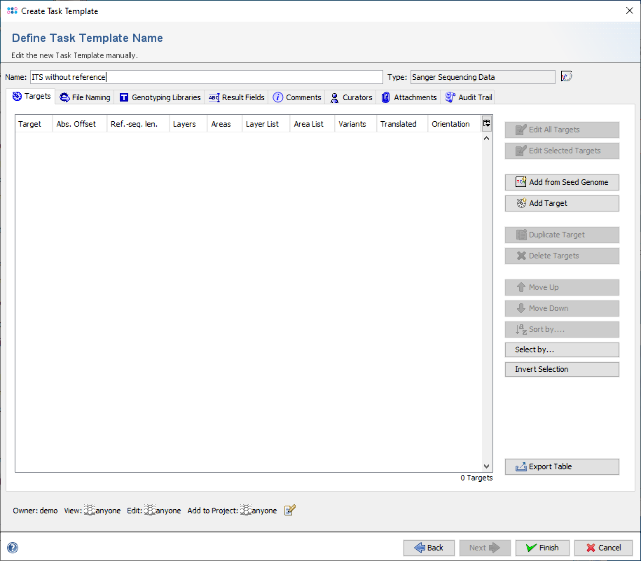
- Step 7: Press the button Add Target to define a new target locus in the Task Template. In the upcoming dialog enter as name for the new Target ITS.
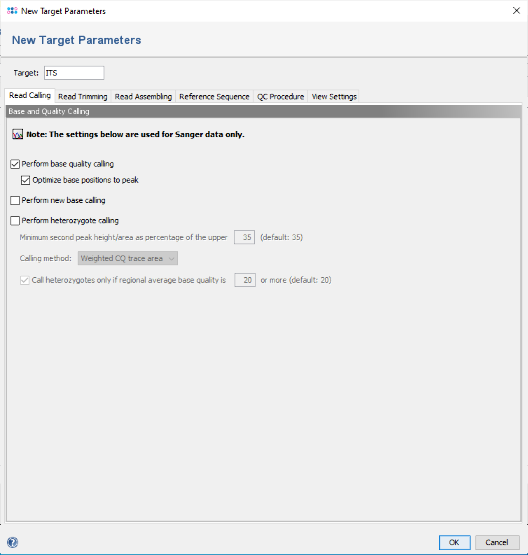
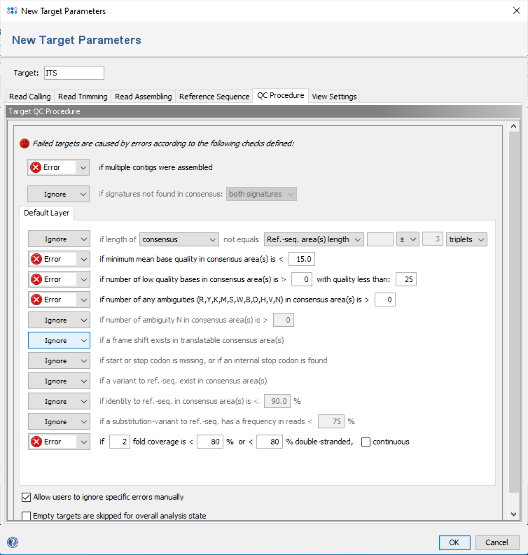
- Step 8: Click on the tab QC Procedure. As no reference sequence is defined for this target, the QC check for frame shifts must be disabled. Click on the box of the frame shift check and change it from Error to ignore. Then confirm the target dialog with OK.
- Step 9: OPTIONALLY: Click on the tab Genotyping Libraries. Press Create New and choose Add Single Target Online Query at NCBI GenBank to search the consensus at NCBI. By default, the Execution Mode is set to Perform automatically, so the query is performed directly after the assembly is done, and repeated after each base editing. However, as there is no reference sequence in this tutorial, the consensus is not trimmed automatically after assembling. Therefore, change the Execution Mode to Never perform automatically so that the NCBI query can be invoked manually after the consensus has been trimmed. Press Finish to add the Query to the Task Template.

- Step 10: Press Finish to confirm the Create Task Template dialog.
- Step 11: Then press OK to add the new Task Template to the Project. Finally save your Project by confirming again with OK.
- Ridom SeqSphere+ is a resequencing software. Once you have setup a project like this you can literally analyze hundreds/thousands of sequence data.
4 Assembling and Analysing Sanger Sequence Data
- Step 1: Choose from the menu File | Process Sanger Sequencing Data. Press the
 button above the file browser panel on the left, and choose the directory where you extracted the tutorial example data.
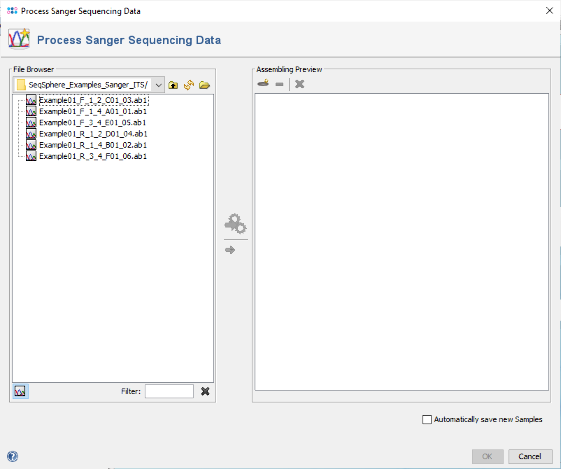
- Step 2: Select the tutorial example data directory or all six files in it, and press the button
 in the toolbar on the top of the right panel.
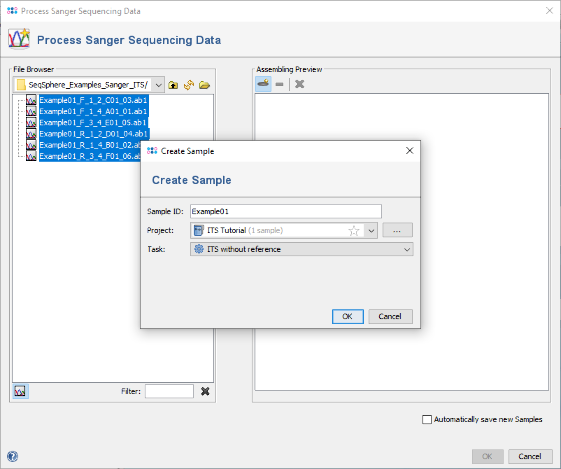
- Step 3: By default the Sample ID is extracted automatically from the shared parts at the beginning of the file names. (For more advanced file namings please see the MLST Sanger tutorial). Check if the correct Project is selected, and press OK.
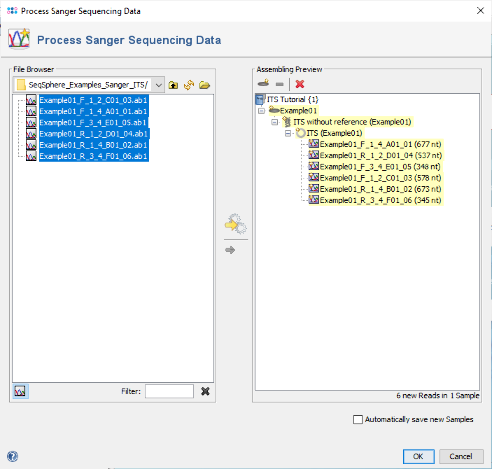
- Step 4: The preview on the right now shows the six chromatograms added to one newly defined Sample. Confirm the dialog to start assembling the chromatograms and processing the Sample.
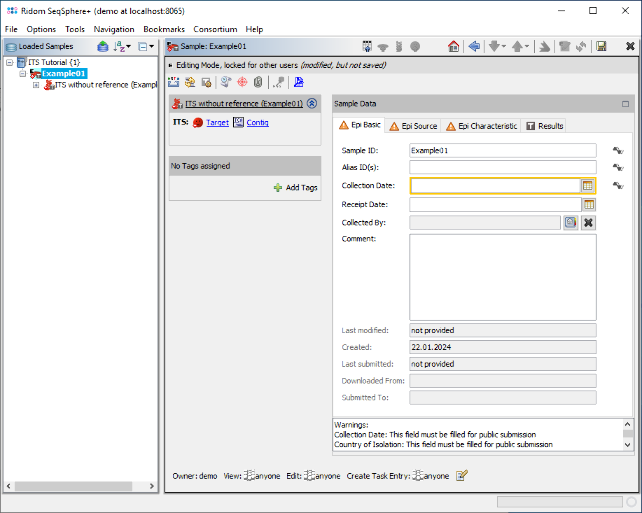
- Step 5: The six reads are now assembled into a new Sample listed in the tree on the left. On the right, an overview and the epi metadata are shown. The overview shows one ITS target. Click on the link Contig to show the assembled sequence data.
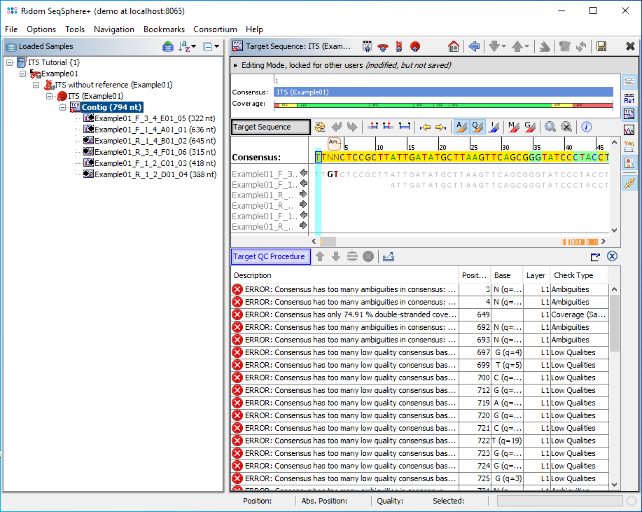
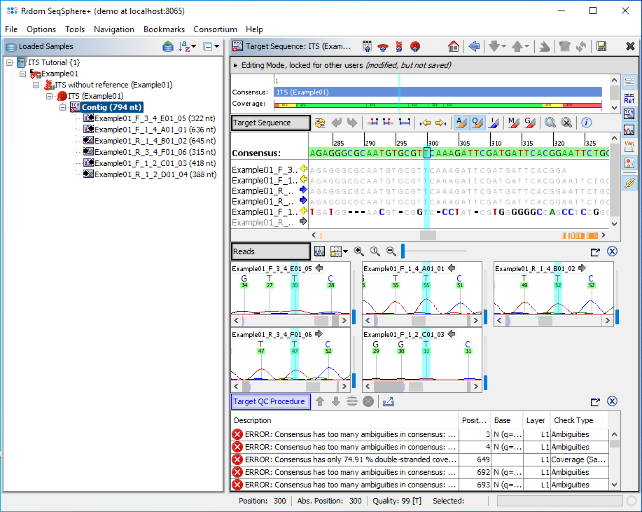
- Step 6: The contig alignment and the results of the Target QC Procedure are shown. The vertical toolbar on the right allows to show and hide different views for the sequence data. Press the button
 to show the chromatograms. Click on a position on the contig or use the button
  to synchronize the positions between the views.
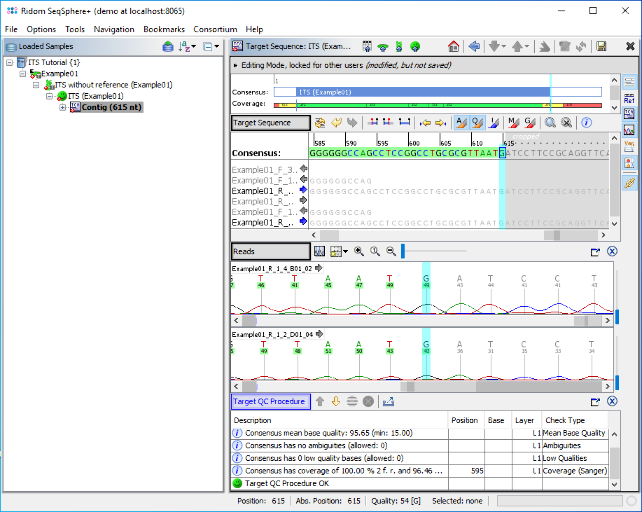
- Step 7: The start and end of the assembly alignment have a low coverage with a high error rate. As no reference sequence or signatures are used, the contig must be trimmed manually. To trim the contig start, click on position 55 and press the button
 (Crop Contig Left). The bases left of the current position will be greyed out. Now click on position 615 and press the button
  (Crop Contig Right) to trim the end of the contig. The target QC succeeds now and the QC table shows a green smiley.
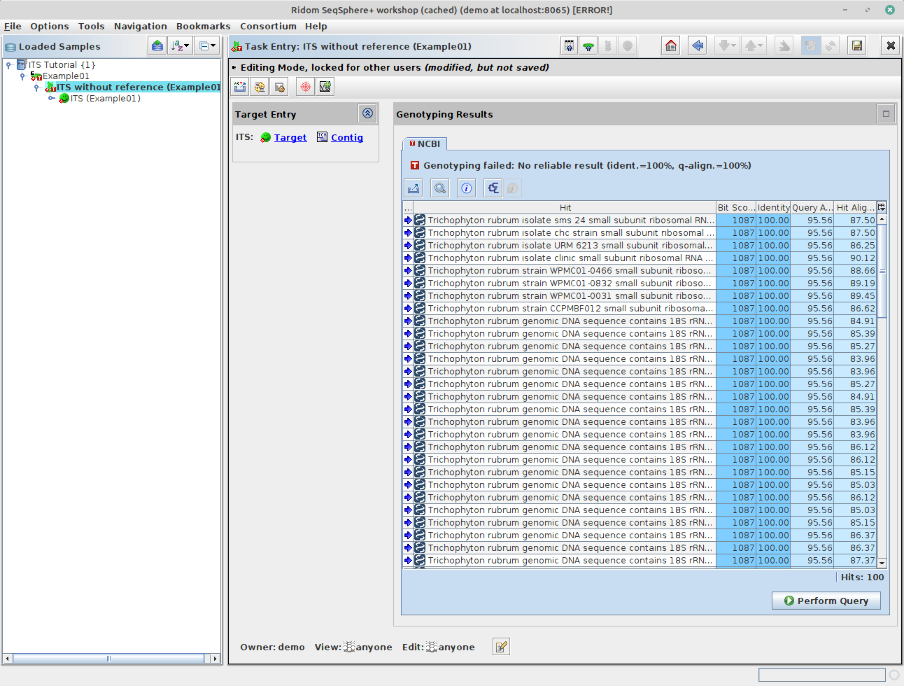
- Step 8: If the NCBI BLAST Query was added to the Task Template, then double-click on the Task Entry node ITS without reference (Example01) in the navigation tree on the left. The Task Entry overview is shown, with an empty Genotyping Results section on the right. Press the button Perform Query at the bottom of this section to start the NCBI BLAST search online. After a while, the NCBI BLAST result will be shown. If the NCBI BLAST Query was added to the Task Template, the result will be stored together with the Sample when it is saved in the database.
- Alternatively, if the query was not added to the Task Template, the NCBI BLAST search can also be invoked manually for any sequence, using the menu function Tools > Gene Utilities > BLAST in NCBI GenBank (Nucleotide).
- Step 9: To use further web services, the consensus can be exported to clipboard or file by right-clicking on the consensus in the 'Target Sequence' section and choosing Copy Bases of Consensus Area(s) to Clipboard or Export Bases of Consensus Area(s) to File. For this tutorial, copy the consensus to the clipboard then go for example to the ISHAM Barcoding Database web service. Now paste in the copied consensus sequence and confirm with the Start alignment button to start the query. The closest hits will be shown on the website.

5 Storing and Retrieving Samples
- Step 1: Choose from the menu
 File | Save All to store the Sample to the database on your SeqSphere+ server.
- Step 2: Choose File | Close All to remove it from the workspace
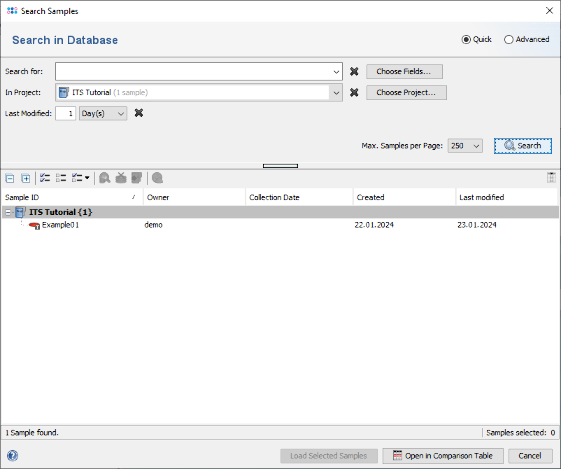
- Step 3: Choose
 File | Search Samples. Select the project in the Project box, and choose 1 day(s) for Recently modified. Then press the Search button.
- Step 4: The sample that just was saved is listed.