Contents
1 Overview
This tutorial describes how to use the Ridom SeqSphere+ software to analyze single target Sanger sequence data (e.g., chromatogram files) with an E. coli 16S rDNA reference downloaded from NCBI. Furthermore, it is explained how to create a Task Template for automated sequence analysis. If a target is only partially sequenced and the target contains repetitive parts (e.g., stems and loops of 16S rDNA) then it is highly recommended to limit the reference sequence only to the part that is sequenced.
2 Preliminaries
- This tutorial requires a running SeqSphere+ client and server. Start the SeqSphere+ server, then start the SeqSphere+ client and initialize the database. For evaluation purpose a free evaluation license can be requested.
- Download and extract the example data archive SeqSphere_Examples_Sanger_16S.zip
3 Download and Prepare 16S Reference Sequence
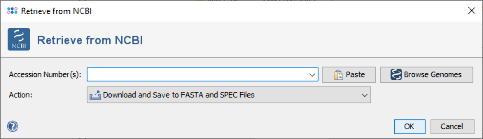
- Step 1: For this tutorial, an E. coli 16S rDNA sequence downloaded from NCBI is used as reference. Therefore, invoke in the menu: Tools | Download from NCBI Genome.
- Step 2: In the field Accession Number(s) enter J01859 and choose in the field Action the option: Download and Open Sequences.
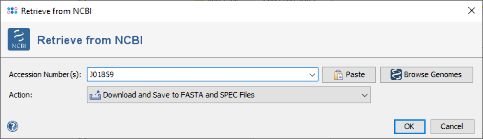
- Step 3: Confirm the download dialog. After a short while the sequence is downloaded and shown.
- Step 4: Copy the following two primer sequences including the FASTA headers together into the clipboard:
>27f
AGA GTT TGA TCM TGG CTC AG

>519r
GWA TTA CCG CGG CKG CTG
- Step 5: Now press the
 button to open the Find dialog. Then press the
  button to paste the copied primers into the fields. For the second primer (519R) click the button
  once to mark it as reverse sequence. Finally mark the checkbox 'Resolve ambiguities' below and confirm the dialog to search the primers.
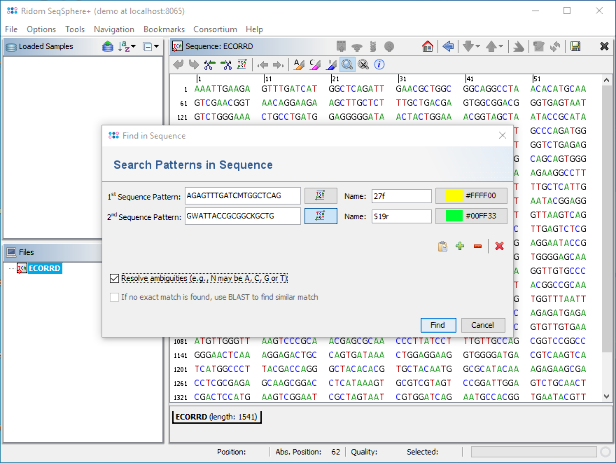
- Step 6: The two primer positions are highlighted yellow and green. Click on the first position after the first primer (A at pos 28). Then click and drag the mouse the the last position just before the second primer (C at pos 517).
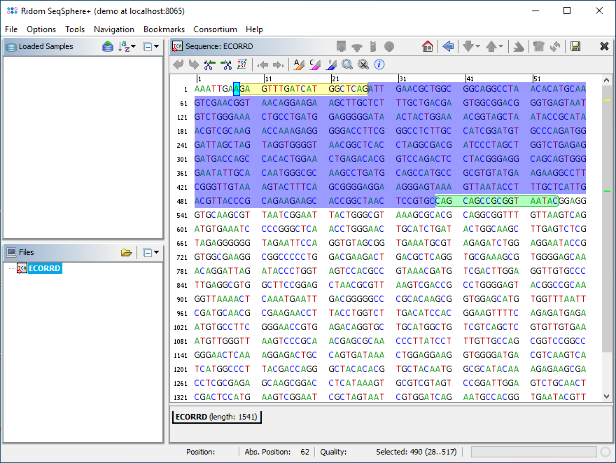
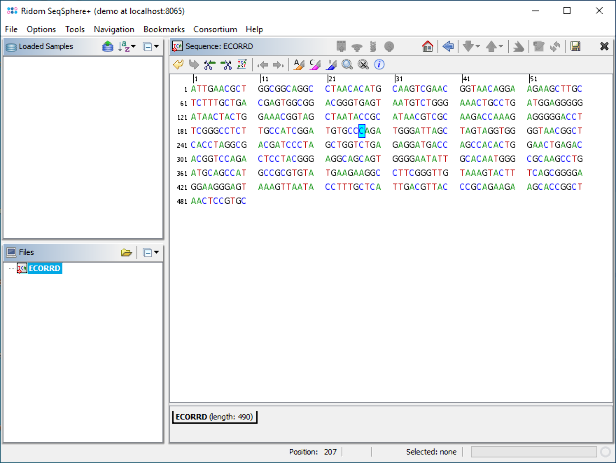
- Step 7: Now right-click into the selected sequence marked blue, and choose Crop Sequence to Selection. Then right-click again into the sequence and choose Copy Sequence to Clipboard. The sequence should be kept in the clipboard until it is used in the next section as reference sequence.
4 Creating Project and Task Template
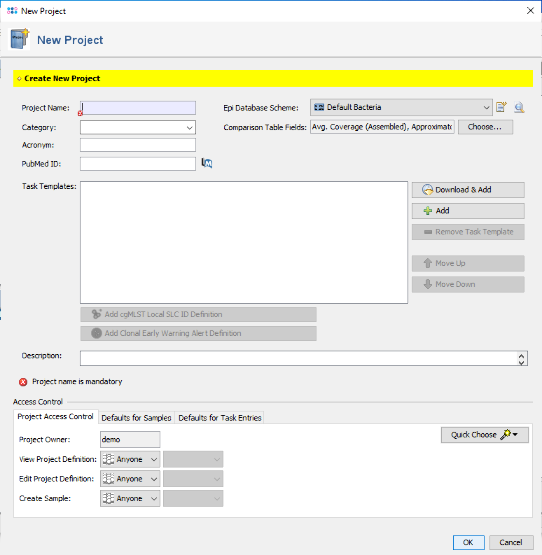
- Step 1: Now create a new Project for use with your sample data with the menu command File | New | Create Project.
- Step 2: Press
 Add in Task Templates section. In the upcoming window click on the button Create New.
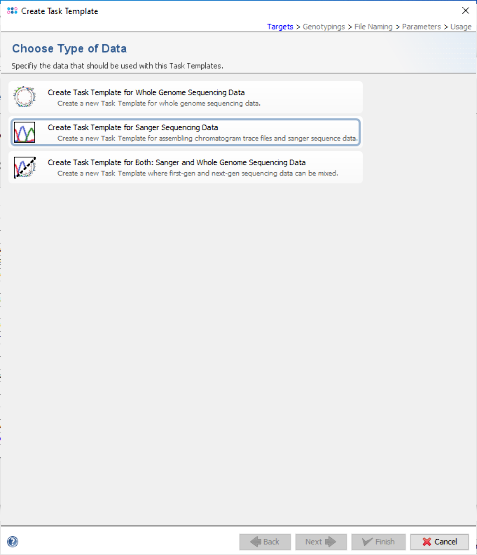
- Step 3: Choose Create Task Template for Sanger Sequencing Data.
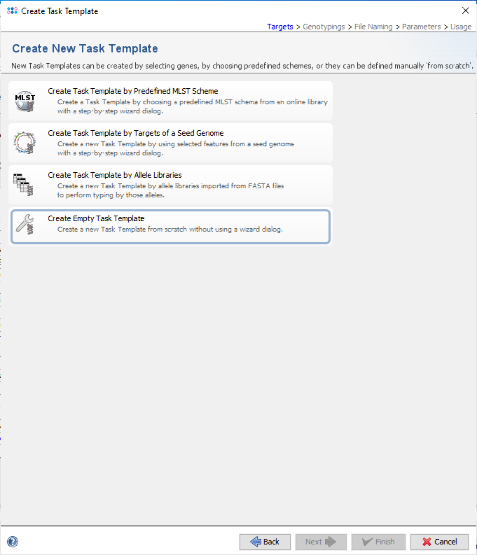
- Step 4: Now choose Create Empty Task Template.
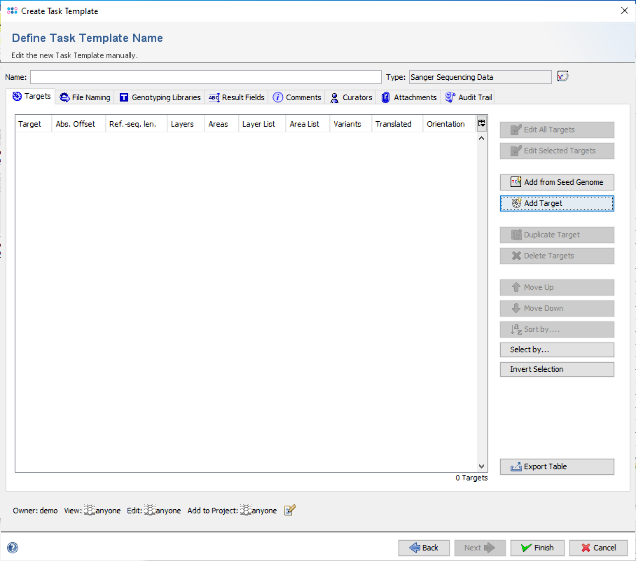
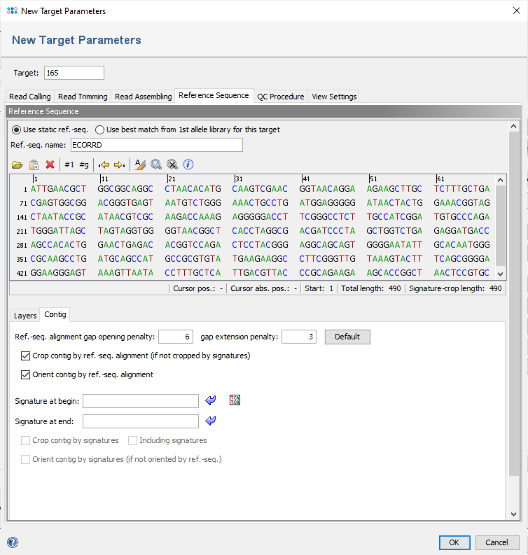
- Step 5: The editor for the new Task Template is shown. Press the button Add Target to add a target locus to the Task Template. In the upcoming dialog click on the tab Reference Sequence.
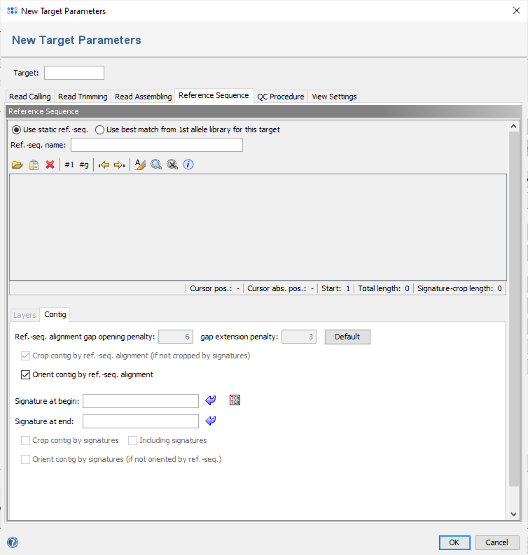
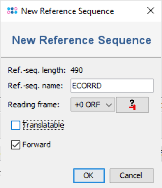
- Step 6: Press the button to paste the previously copied truncated E. coli 16S rDNA sequence here. In the upcoming dialog uncheck the checkbox Translatable as the 16S rDNA target is not coding. Confirm this dialog by pressing OK.
- Step 7: The sequence is now inserted as reference. As the checkbox Crop contig by ref.-seq. alignment is selected by default, the contig will be trimmed to the overlap with this reference.
- Additionally or alternatively to truncating the user consensus sequence to match the reference sequence, two signatures can be defined in the Target Parameters. For example, this can be used to trim the consensus automatically by primer sequences if the reference sequence covers a whole gene that was only partially sequenced by the user. If signatures are defined, and if they were found in the consensus, then the consensus is trimmed by the signatures. Else it is trimmed by the reference sequence if defined. By en- or disabling the checkbox Including signatures the consensus is trimmed before or after the signatures.
- Step 8: In the top of the window enter as name for the new Target, for example 16S. Then confirm the Target dialog to come back to the Task Template editor. Enter a name for the new Task Template (e.g., 16S with E. coli reference).
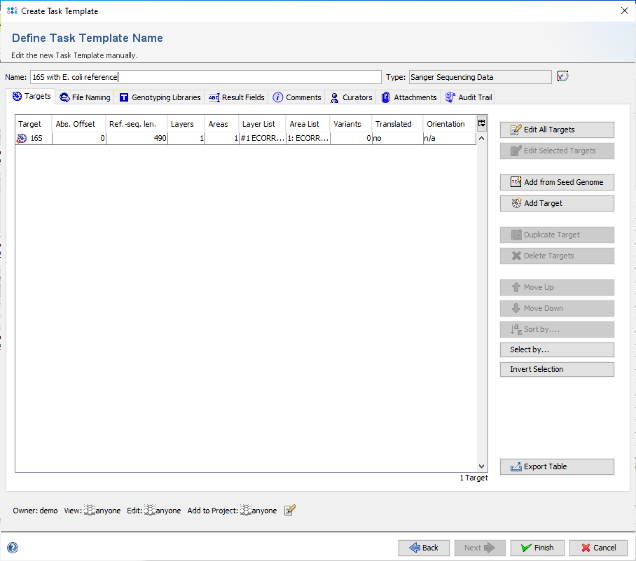
- Step 9: Confirm the Task Template editor with Finish to add the newly created Task Template to the Project. Finally enter a name in the field Project Name (e.g., 16S Tutorial).
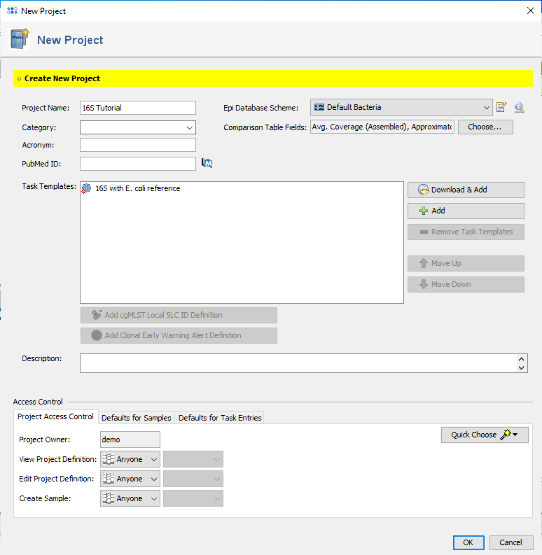
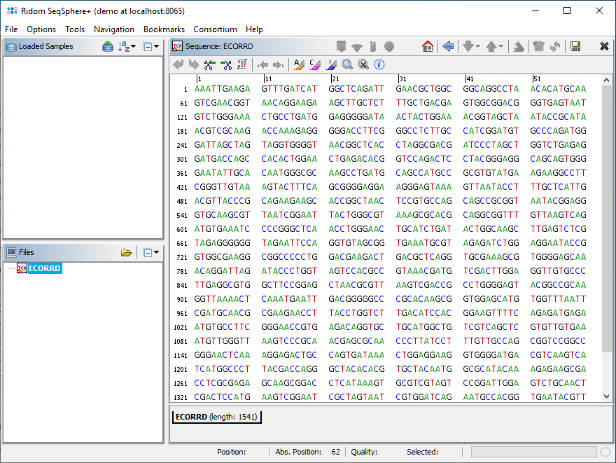
- Step 10: Confirm the New Project dialog by pressing the OK button to store the newly created Project. Finally invoke in the menu File | Close All to close the temporary sequence ECOORD that was truncated to function as reference sequence. There is no need to store it to a file, so just press Close in the confirmation dialog.
5 Assembling and Analysing Sanger Sequence Data
- Step 1: Choose from the menu File | Process Sanger Sequencing Data. Press the
 button above the file browser panel on the left, and choose the directory where you extracted the tutorial example data.
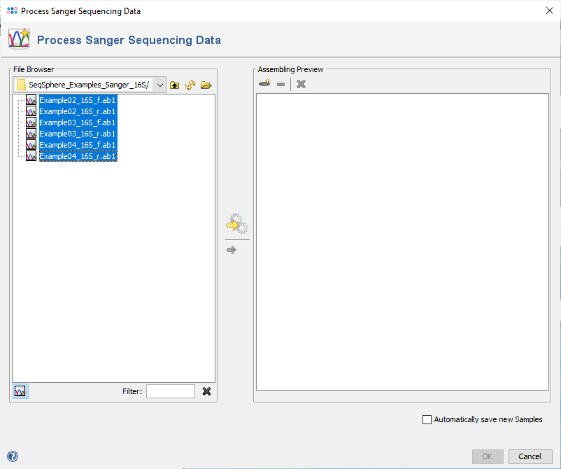
- Step 2: Select the tutorial example data directory or all of the files in it, and press the button
 in the toolbar in the center of the dialog.
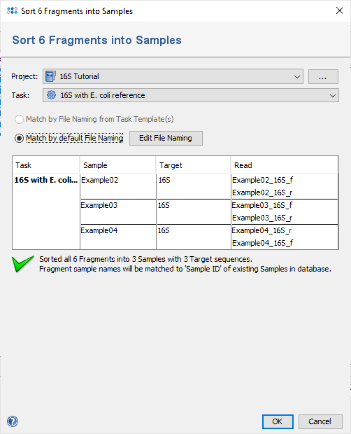
- Step 3: A dialog opens up to sort the chromatograms (fragments) into Samples. Be sure that the correct 16S Project is selected. Select Match by default File Naming. As the file naming is recognized automatically, the six chromatograms will be sorted into three different samples. If this does not work for your own data later, use the button Edit File Naming to adjust the settings. Now confirm the dialog with OK.
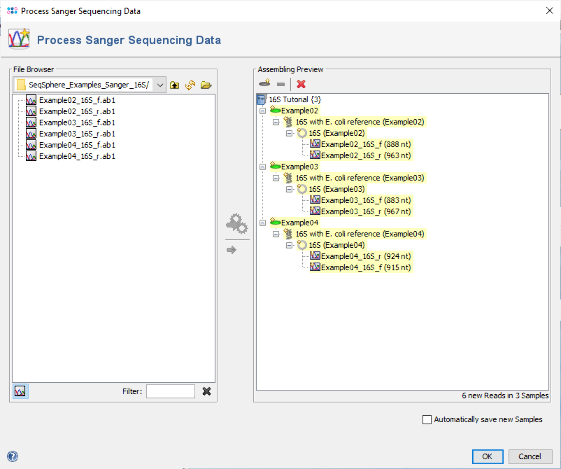
- Step 4: The preview on the right now shows the six chromatograms sorted into the three newly defined Samples. Confirm the dialog by pressing the OK button to start assembling the chromatograms and processing the Samples.
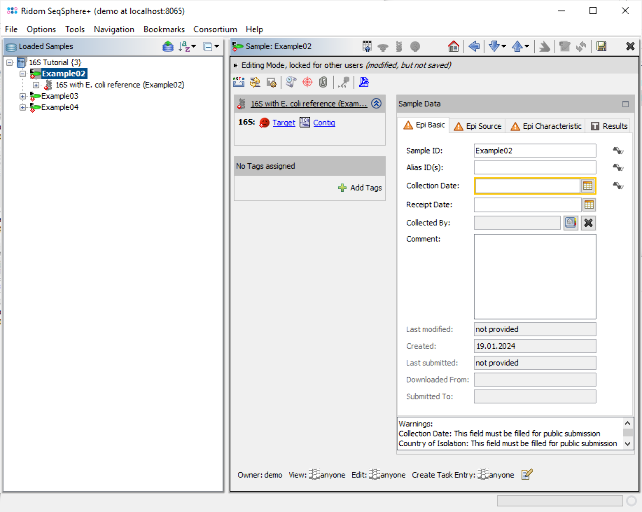
- Step 5: After a short while, the reads are assembled and the three new Samples are listed in the navigation tree on the left of the main window. On the right an overview and the epi metadata of the first Sample is shown, for the processed 16S target a link to the Target and to the Contig are shown. Click on the link Contig to show the assembled sequence data. The contig alignment was automatically trimmed to the reference sequence. However, in the Target QC Procedure section an error is highlighted at position 62. Click on this line to jump to the position in the Target Sequence section.

- Step 6: The consensus has a low base quality at this position. The vertical toolbar on the right allows to show and hide different views for the sequence data. Press the button
 to show the chromatograms.
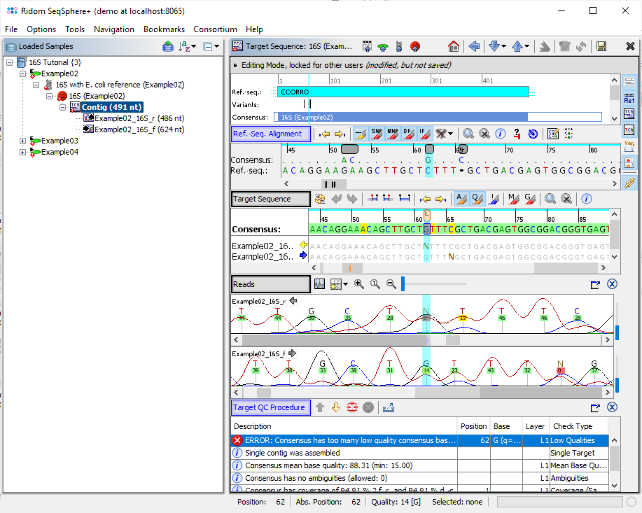
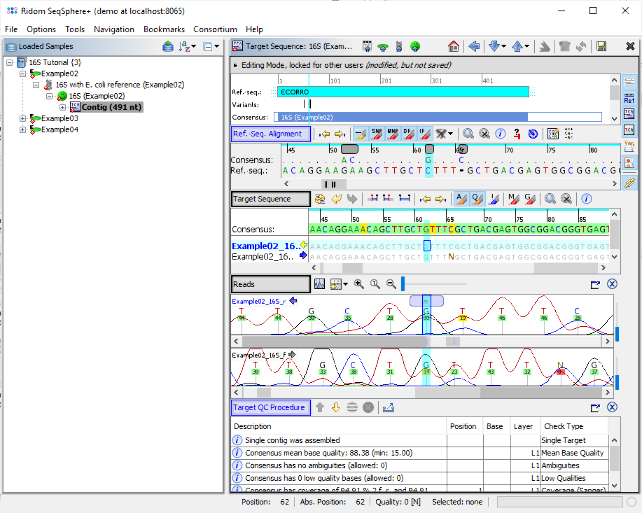
- Step 7: The first chromatogram shows an ambiguity base call N at this position. Right click on this base call, choose Substitute Base... and type G to overwrite the N in the chromatogram and click OK. The QC error is gone now, and the QC has succeeded as indicated by the now green 'smiley' icon in the navigation pane.
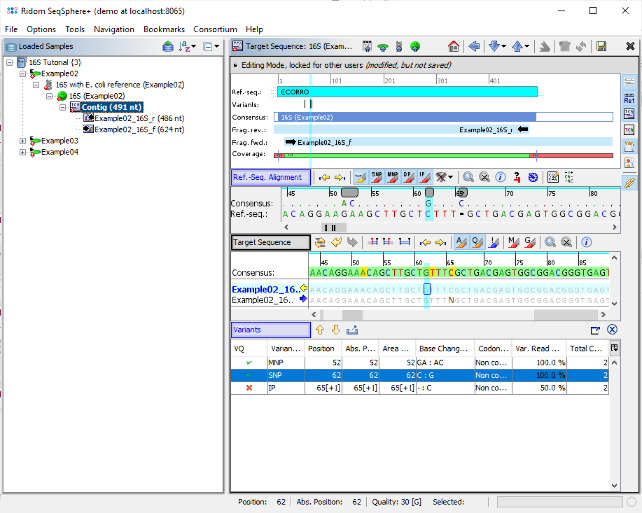
- Step 8: Press the button
 to show the variants between the reference and the assembled consensus in a table.
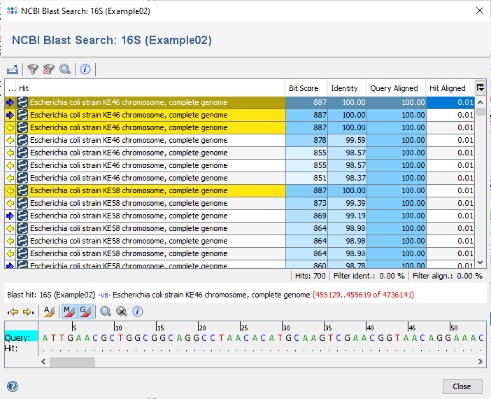
- Step 9: Invoke the menu function Tools | Gene Utilities | BLAST in NCBI GenBank (Nucleotide) and choose one of the three samples to start an online NCBI BLAST search. After a while the BLAST result table will be shown.
- Step 10: For use with further web services, the consensus can be exported to the clipboard or to a FASTA file by right-clicking on the consensus in the 'Target Sequence' section and choosing Copy Bases of Consensus Area(s) to Clipboard or Export Bases of Consensus Area(s) to File.
6 Storing and Retrieving Samples
- Step 1: Choose from the menu
 File | Save All to store the Samples to the database on your SeqSphere+ server.
- Step 2: Choose File | Close All to remove them from the workspace
- Step 3: Choose
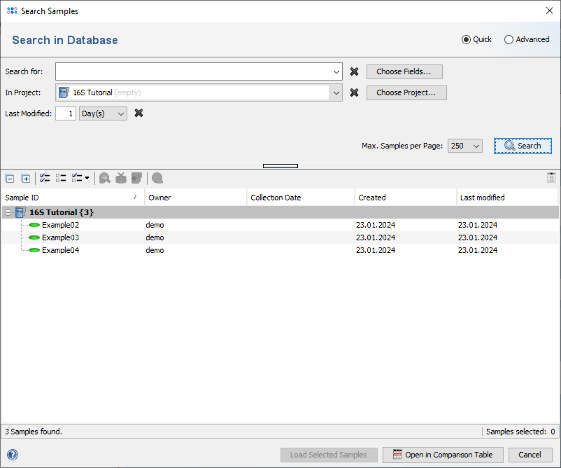
 File | Search Samples. Select the project in the Project box, and choose 1 days for Recently modified. Then press the Search button.
- Step 4: The samples that just were saved are listed.